 That weird moments your phone charging ports spoils at the middle of the night or when you are doing something serious. I know how frustrating it can be, i have experience it too, but what will you do in a situation like this when no phone repairer is close by. If your phone is not charging very well, then it might be because of certain issues. You don’t have to rush to the phone repairer if you experience certain issues, all you need is a little patience and do the things i recommend for you, in this article. In this article i will guide you through how you can fix your phone charging port yourself like a pro. This DIY will not only save you time but it will also save you money.
Why Is My iPhone Charging Port Not Working?

Your charging port might not be working because of charging port malfunctioning. S o before we dele into the repair process lets take a look at the causes of charging port malfunctioning.
Dirty or Blocked port:�Most times the ways you handle your phone will cause your phone charging port to start malfunctioning. If your charging port is full of dust it might cause blockage which will cause your phone to stop charging.
Loose Connection:Most times, your charging port might be loose, and it will result to your phone not charging properly.
Software Issues :Software sometimes can cause your phone to start having charging problems, this one is less common than hardware issues.
Broken or worn-out pins:If you are always inserting your charger with force, then you might facing charging problems. The pin inside charging port might become loose or damage if you are not properly inserting your charger.
Tools You’ll Need
As your own phone repairer, you need to have some of this tools so you can start fixing your phone charging port yourself, the following tools are what you need to get the job done and also safe yourself the frustration.
I know you will be asking yourself what you need tools for when you are not, a phone repairer but what will happen when you go camping and your charging port gets bad.
Some of the tools you need are:
Small screwdriver
Plastic prying tools
Compressed air can
Isopropyl alchohol
Cleaning brush
Tweezers
Replacement parts.
Step-by-Step Guide to Repairing Your iPhone Charging Port
This is where it gets more interesting, we will be diving into the step by step guide on how to repair you charging port yourself.
Step 1
The first thing you have to do if you find out your charging ports is faulty is to power off you iphone. Always power of your phone, to avoid damaging internal components.
To power off your phone: Hold your power button until the slider appears, then swipe to turn off.
Step 2: Charging port inspection
Always check your charging port, to see if there’s any visible damage. Check properly if will see any sign of debris, dirt or corrosion. You can’t see the inner part without light so its advisable you use a flashlight so you can see the inner view of the phone charging port clearly. If there’s any dirt it might be the cause of charging problem.
Step 3: Clean the Charging Port
Even if your phone is not faulty its important you clean your phone charging port from time to time. It will save your charging port from getting rusty or bad. Some of the ways you can clean your phone charging port is by, using compressed air to clean you phone charging port, you can do this by holding the an few inches away from the port and blow the air directly into the charging port this will help help dislodge and loose of debris.
You can also use soft brush like ( soft tooth brush or small paint brush) to brush away debris and also gently clean inside the port.
Most people use water to clean their charging port, which is a very bad habit. Don’t use water to wash your charging port instead use Isopropyl Alchohol, dip a soft cotton swap into isopropyl alchohol, gently use ith soaked cotton to clean the charging port.
Step 4: Check for Loose Connections
You might have done everything listed above without getting a solution, its time to check if your charging port has loose connections. To do this you need to be a little bit technical, use a plastic prying tool to carefully open the device. Carefully check if the charging port is loose or has any loose connections, if you notice any try fix the port properly or better still look for a replacement.
Step 5: Replace the Charging Port
Changing the charging port need technical experience, but you can watch proper videos on youtube on how to change your phone charging port yourself. However i will give you a step by step guide on how to replace your charging pot yourself.
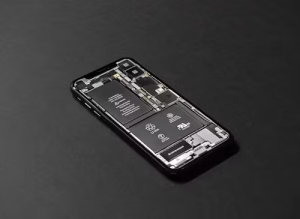
Step 1 : You need to disassemble the phone by using screwdriver
Next on is by Disconnecting the battery, its advisable you always disconnect your phone battery before working on any internal part of your phone, to prevent damage.
After disconnecting the battery, next on is remove the broken charging port, by using screw.
Then you can install the new one you got, be very careful while installing the new charging port, make sure the the charging port align properly.
Then you can reassemble the iphone, using screw.
But if you are not comfortable doing this its advisable you visit a professional phone repairer so you don’t damage your phone completely.
Step 6: Test Your iPhone
If you’ve done all the steps listed, in this article, you have to test your phone if its working properly, try recharging your phone. If it did not work properly you have to visit a professional phone repairer for assistance.
You can also maintain your charging port by :
Avoiding overuse: As said before don’t force your charging cable into the port, be patience and always plug your charger gently.
Don’t use your phone anyhow, try your best to keep it clean, regularly clean your phone charging port. Also use protective cases.
Repairing your iPhone charging port can be a straightforward task if you’re dealing with dirt, debris, or a minor loose connection. With the right tools and a steady hand, you can avoid costly repairs and extend the lifespan of your device.


